Introduction
Few months back I had to build a tree with selectable branches as part of a user story. This article describes the first step in the development of the tree. ASP.NET MVC 2 has a feature called template. A template is new kind of strongly typed partial view used in conjunction with the new Html.DisplayFor and Html.EditorFor methods introduced in MVC 2. When we call Html.DisplayFor() on a property of a view model, MVC will look for a template for that type and render it accordingly.
In this article I will be rendering a hierarchical tree as a html list. I will keep it very simple and won’t be adding any styling or behaviours. I'll do those in next articles. I’m only interested in showing how the ASP.NET MVC 2 behaves when dealing with templates.
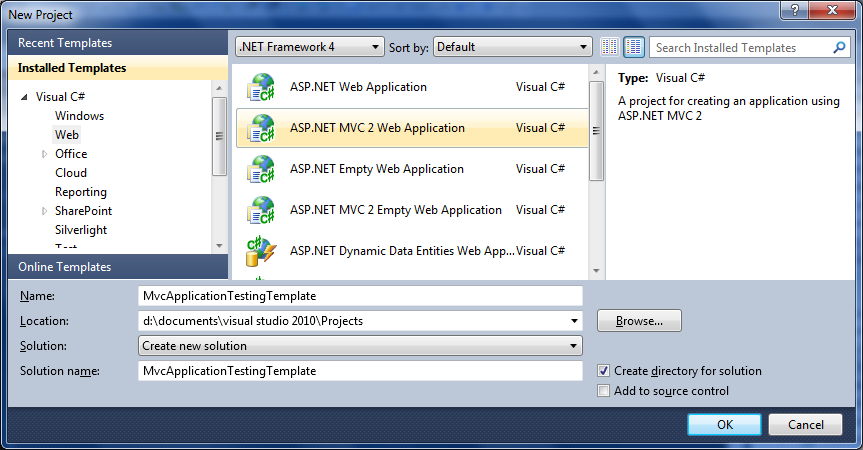
Creating a new ASP.NET MVC 2 project
Let’s create the project. We’ll use the default ASP.NET MVC 2 web application template so that we can quickly start displaying something. The hardest part here is to find a name for the project.
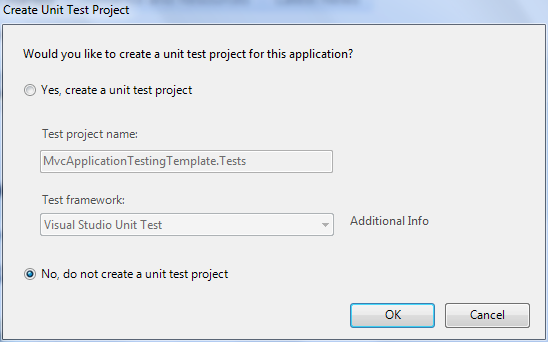
After that, Visual Studio will ask you if you want to create a test project for the project. If we were writing production code the answer would be “of course” but this is a spike project only intended to explain something in my case and to test an MVC 2 feature in your case. So we don’t need a test project for now.
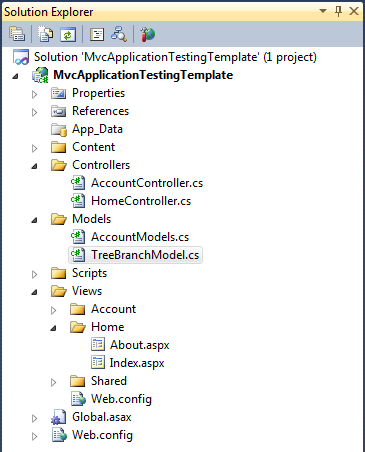
Alright! So now we have a new project. Solution Explorer should look like the following:

Run the application to make sure we have something working before adding anything.
Creating the tree branch view model
So now we need to define what a branch is. For now we only need to have name for the branch as well as a list of children.
Add a class to the Models folder in Solution Explorer. Let’s call it TreeBranchModel.
Creating the tree branch view model
So now we need to define what a branch is. For now we only need to have name for the branch as well as a list of children.
Add a class to the Models folder in Solution Explorer. Let’s call it TreeBranchModel.
Open up the new class and add the Name and Children properties.
using System.Collections.Generic;

namespace MvcApplicationTestingTemplate.Models
{
    public class TreeBranchModel
    {
        public string Name { get; set; }
        public IList<TreeBranchModel> Children { get; set; }
    }
}
Notice that the children property is a list of TreeBranchModel as they are also branches that can have children.
Creating the template
Creating the template
In order for MVC to associate a view model to a template and be able to use the DisplayFor() type of method we need to create a template with the same name as the view model. The template will also need to be under the DisplayTemplates folder.
When using DisplayFor() in a view or another template, MVC looks first in the same area where the call is made for the DisplayTemplates folder. If it cannot find a template for the requested type it will then look in the Views/Shared/DisplayTemplates folder. The latter folder can be very useful to define template used on the whole website such as DateTime.
In our case the template will only be used in the same area so we’ll just create a DisplayTemplates folder as follow:

The next step is to add a new MVC 2 view user control to the DisplayTemplates folder. Don’t forget to use the same name as for the view model otherwise we won’t be able to use the MVC 2 “magic”.

Solution Explorer should look like this:

Let’s edit the template. The first thing is to strongly type the template so it knows what view model to expect. Then just add the html to display a tree branch.
<%@ Control Language="C#" Inherits="System.Web.Mvc.ViewUserControl<TreeBranchModel>" %>
<%@ Import Namespace="MvcApplicationTestingTemplate.Models" %>

<ul>
    <li><%: this.Model.Name %></li>
    <%: this.Html.DisplayFor(m => m.Children) %>
</ul>
We just display the name of the branch as the actual list item then we call the DisplayFor() method on the view model Children property. MVC will reuse the same template to display the children recursively as Children property is a list of TreeBranchModel. So we leave the hard work to MVC and just relax and have a cup of tea.
Trying out the tree
The first step is to modify a controller action to populate a tree branch view model with some test data and then pass it down to a view.
Trying out the tree
The first step is to modify a controller action to populate a tree branch view model with some test data and then pass it down to a view.
As we’ve create a default ASP.NET MVC 2 web application we already have some controllers. Let’s pick the home controller and just modify the index action.
using System.Collections.Generic;
using System.Web.Mvc;
using MvcApplicationTestingTemplate.Models;

namespace MvcApplicationTestingTemplate.Controllers
{
    [HandleError]
    public class HomeController : Controller
    {
        public ActionResult Index()
        {
            return View(BuildRootBranch());
        }

        private static TreeBranchModel BuildRootBranch()
        {
            var firstRootBranchChildChildModel = new TreeBranchModel
            {
                Name = "RootBranch Child1 Child"
            };

            var firstRootBranchChildModel = new TreeBranchModel
            {
                Name = "RootBranch Child1",
                Children = new List<TreeBranchModel>
                {
                    firstRootBranchChildChildModel
                }
            };

            var secondRootBranchChildModel = new TreeBranchModel
            {
                Name = "RootBranch Child2"
            };

            return new TreeBranchModel
            {
                Name = "RootBranch",
                Children = new List<TreeBranchModel>
                {
                    firstRootBranchChildModel,
                    secondRootBranchChildModel
                }
            };
        }

        public ActionResult About()
        {
            return View();
        }
    }
}
BuildTreeBranch() is just a method to create some test data and populate the main tree branch called root branch.
The index action will build a root branch containing two children. The first child of the root branch will also contain a child. The action will then pass the root branch down to the index view.
The last thing that we need to do is to modify the index view to handle the view model. Let’s make it a strongly typed view accepting a view model of type TreeBranchModel.
<%@ Page Language="C#"
    MasterPageFile="~/Views/Shared/Site.Master"
    Inherits="System.Web.Mvc.ViewPage<TreeBranchModel>" %>
<%@ Import Namespace="MvcApplicationTestingTemplate.Models" %>


    Home Page


    <%: this.Html.DisplayForModel() %>
Because the view is strongly typed for the TreeBranchModel view model we can call the Html.DisplayForModel(). The DisplayForModel() is another new method to deal with templates. This method renders the view model of the strongly typed index view.
If you run the application you should get something like this:
If you run the application you should get something like this:

The generated html for the tree is simple and clean.
<ul>
    <li>RootBranch</li>
    <ul>
        <li>RootBranch Child1</li>
        <ul>
            <li>RootBranch Child1 Child</li>
        </ul>
    </ul>
    <ul>
        <li>RootBranch Child2</li>
    </ul>
</ul>
Conclusion
In this article we saw how to use the new ASP.NET MVC 2 template feature to display a tree in a minimum of effort. The missing things now are the css styling and a way to collapse/expand the branches. I’ll write other articles for those in a near future.
In this article we saw how to use the new ASP.NET MVC 2 template feature to display a tree in a minimum of effort. The missing things now are the css styling and a way to collapse/expand the branches. I’ll write other articles for those in a near future.


Great Tuto, Mate!
ReplyDeleteGlad you like it
ReplyDeleteVery useful!! thank you very much!!! :)
ReplyDelete